How to migrate data from S3 bucket to the Amorphic dataset?

info
- Follow the steps mentioned below.
- Total time taken for this task: 20 Minutes.
- Pre-requisites: User registration is completed, logged in to Amorphic and role switched
Tidbits
- S3 connections are used to migrate data from a
remote S3 bucketto Amorphic's dataset. - Remote S3 bucket could be in a different AWS account.
Create a source connection
- Click on 'Connections' widget on the home screen or click on
INGESTION-->Connectionson the left side navigation-bar or you may also click onNavigatoron top right corner and search forConnections. - Click on a ➕ icon at the top right corner.
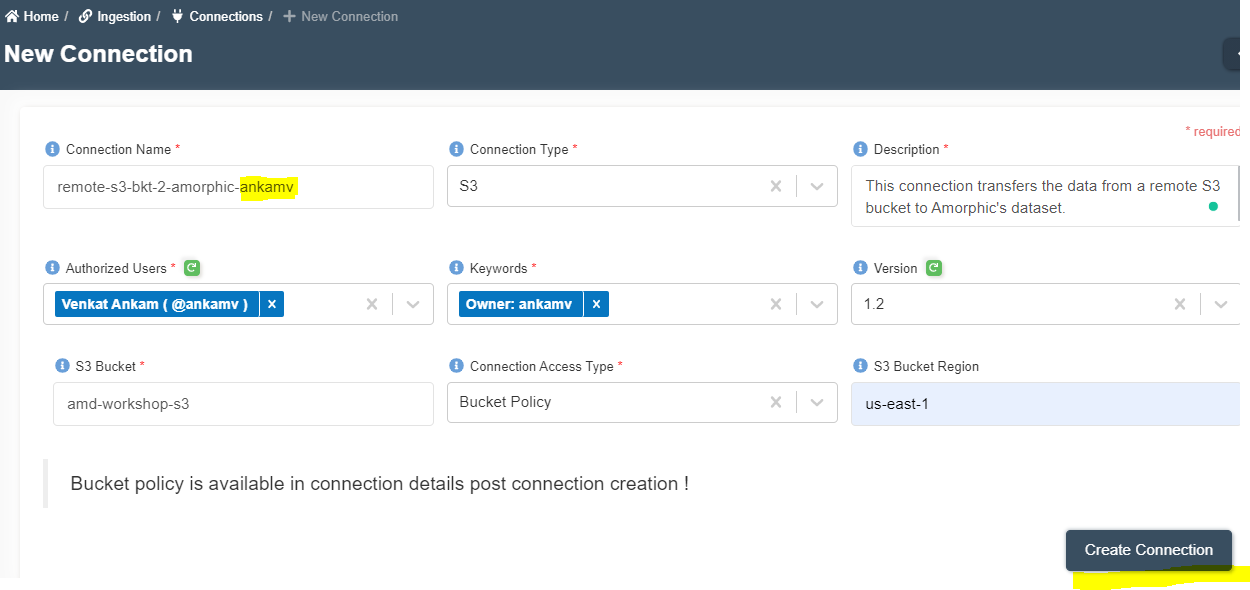
- Enter the following details and click on
Create Connection.
{
  "Connection Name": "remote-s3-bkt-2-amorphic-<your-userid>"
  "Connection Type":  "S3"
  "Description": "This connection transfers the data from a remote S3 bucket to Amorphic's dataset."
  "Authorized Users": "Select your user name and any other user names you want to grant permission"
  "Keywords": "Add relevant keywords like 'S3'. This will be useful for search"
  "Version": "1.2"
  "S3 Bucket": "amd-workshop-s3"
  "Connection Access Type": "Bucket Policy"
  "S3 Bucket Region": "us-east-1"
}
Update bucket policy and test connection
- Once the connection is created,
bucket policyandKMS Key Policyare available ondetailstab as shown below.
- Source bucket policy needs to be with the policy shown above.
- If the source bucket has a custom KMS key attached, then please update your source KMS key policy with the policy shown above.
- For this workshop, source bucket
amd-workshop-s3is already enabled with necessary permissions. - Test the connection by clicking ⚡ icon.
- You must get
Connection tested successfullymessage as shown below. - If connection fails, you need to correct the bucket policy of source bucket.

Create a target dataset
- Click on 'DATASETS' --> 'Datasets' from left navigation-bar.
- Click on ➕ icon at the top right corner.
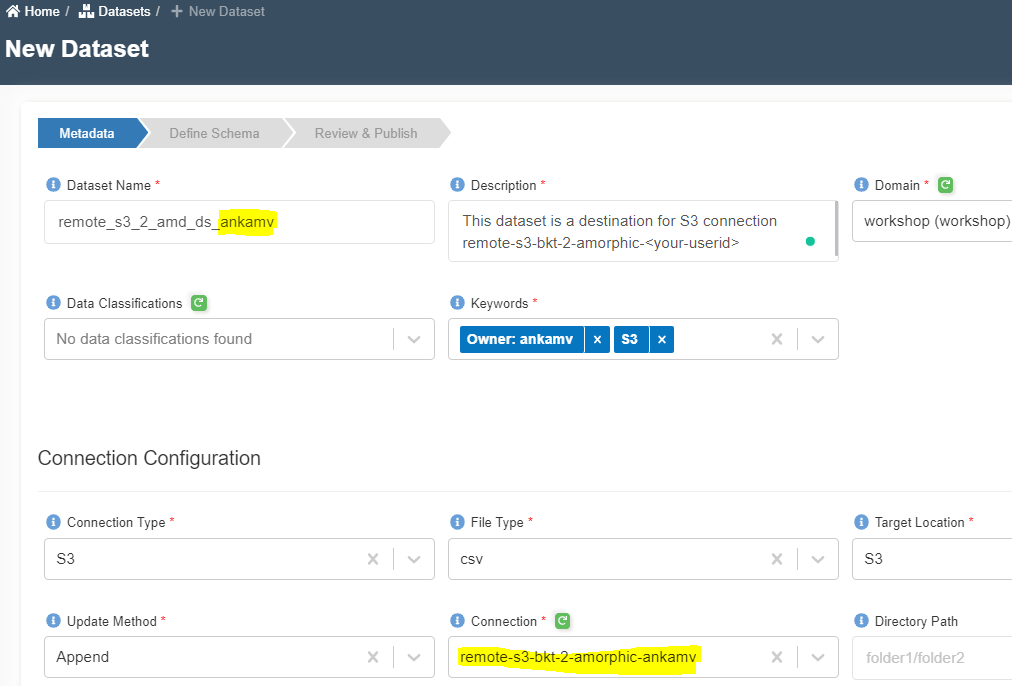
- Enter the following information and click on 'Register'.
{
  "Dataset Name": "remote_s3_2_amd_ds_<your_userid>"
  "Description": "This dataset is a destination for S3 connection remote-s3-bkt-2-amorphic-<your-userid>"
  "Domain": "workshop(workshop)"
  "Data Classifications":
  "Keywords": "S3"
  "Connection Type": "S3"
  "File Type": "csv"
  "Target Location": "S3"
  "Update Method": "Append"
  "Connection": "remote-s3-bkt-2-amorphic-<your-userid>"
  "Directory Path":       <-- leave it blank to pull all files.
  "Enable Malware Detection": "No"
  "Enable AI Services": "No"
  "Enable Data Cleanup": "No"
}
Setup a schedule
- Click on 'SCHEDULES' from left navigation-bar.
- Click on ➕ icon at the top right corner.
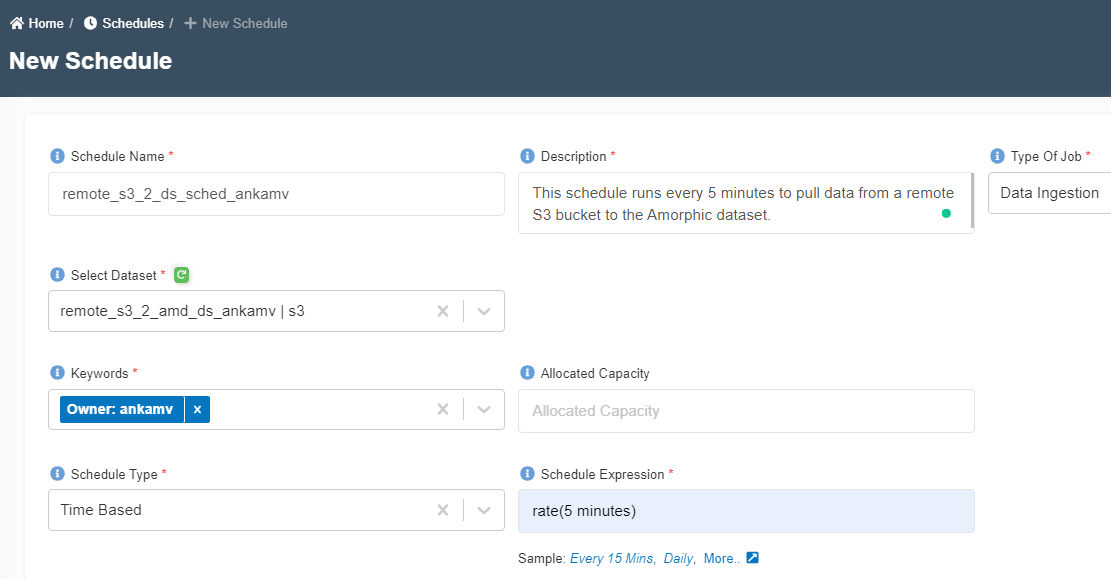
- Enter the following information and click on 'Create'.
{
  "Schedule Name": "remote_s3_2_ds_sched_<your_userid>"
  "Description": "This schedule runs every 5 minutes to pull data from a remote S3 bucket to the Amorphic dataset."
  "Type Of Job": "Data Ingestion"
  "Select Dataset": "remote_s3_2_amd_ds_<your_userid> | s3"        <-- Click ↩️ icon to refesh the list
  "Keywords": "your_userid"
  "Allocated Capacity":
  "Schedule Type": "Time Based"
  "Schedule Expression": "rate(5 minutes)"
}
Add a file to source bucket
- Press the
ctrlbutton twice or click onNavigatorat the top right corner. - Type
add_files_to_bucketin the navigator's search bar. - Click on the jobs matched. This will take you to the job's detail page. If you are not able to access it, contact admin.
- Click on the
Run Job▶️ icon and click on submit. - Go to
Executionstab to monitor the status of the job. Once finished, it will add a file to the S3 bucket. - 💡 This job has been pre-configured to save time for you.
Check data transfer
Execution Statustab of the schedule shows the status of executions as shown below.
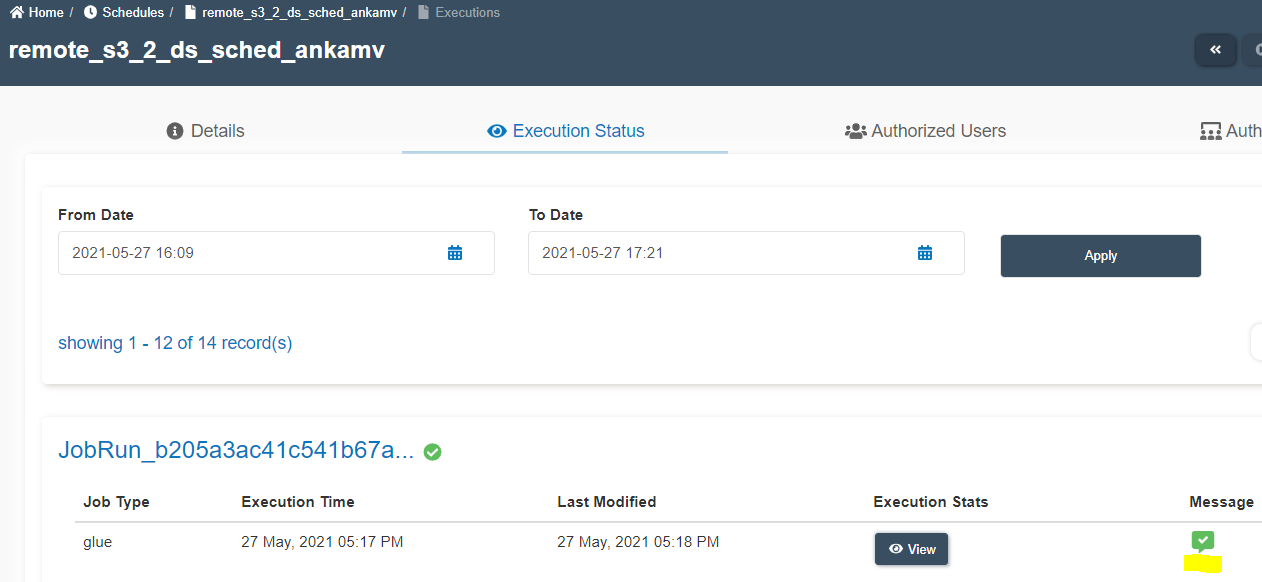
- Hover on the message icon ✅ to see the number of files transferred.
- For more details, click on 'three dots' and check output logs.
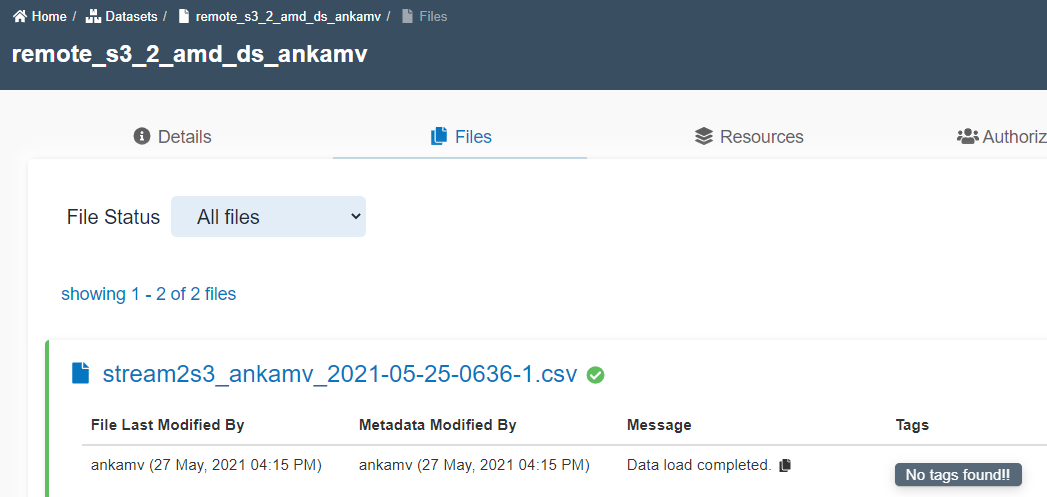
- Check the
filestab of the dataset. The files added to the source bucket should appear here.
Disable schedule
- You don't want to keep running the schedule forever.
- Click on the
Disable Scheduleicon of the schedule page. - Click
Yes.
You can do more...
- Create a new schedule to check the behaviour of data transfer.