How to create and use ETL endpoint and notebook on Amorphic?

info
- Follow the steps mentioned below.
- Total time taken for this task: 20 Minutes.
- Pre-requisites: User registration is completed, logged in to Amorphic and role switched
Generate a public and private key pairs
- Run the following command. Hit
enterwhen prompted for 'Enter passphrase' and 'Enter same passphrase again'.
ssh-keygen -t rsa -C your_email@example.com
- This will save two files under
.sshof home directory.- Private key pair name is
id_rsa - Public key pair name is
id_rsa.pub.
- Private key pair name is
- Copy the contents of
id_rsa.pubfile.
Create an ETL endpoint
- Click on 'ETL' --> 'Endpoints' from left navigation-bar.
- Click on ➕ icon at the top right corner.
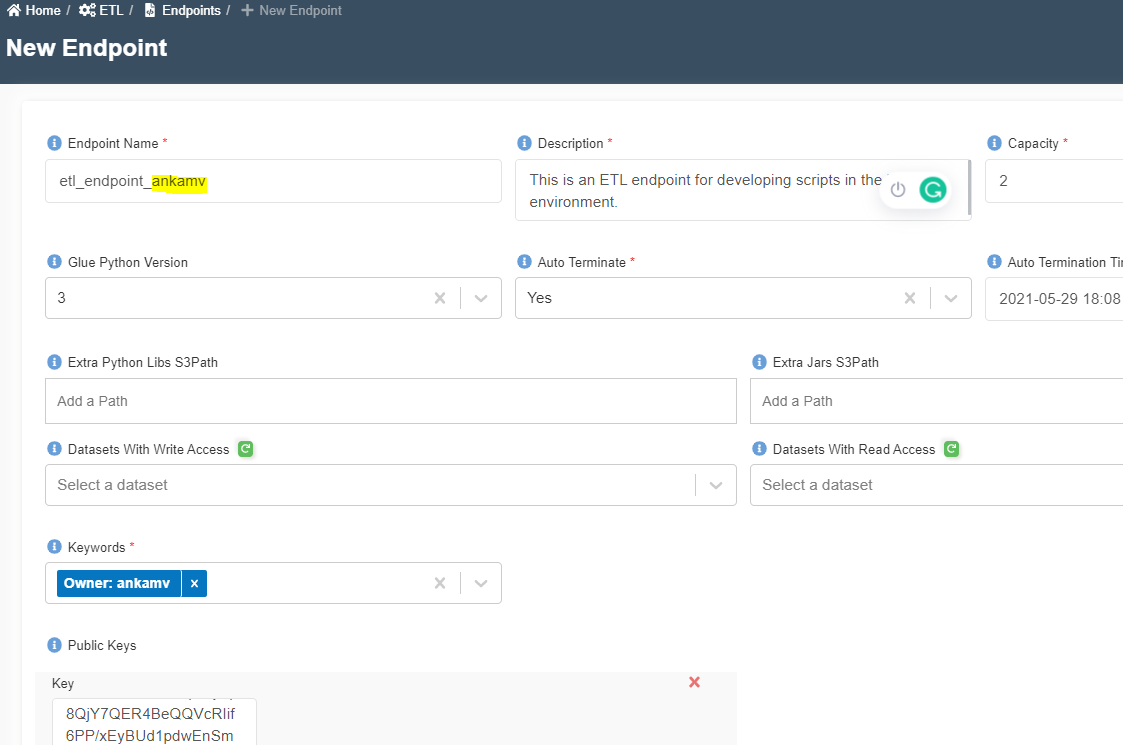
- Enter the following information and click on 'Create'.
{
  "Endpoint Name": "etl_endpoint_<your_userid>"
  "Description": "This is an ETL endpoint for developing scripts in the local environment."
  "Capacity": 2
  "Glue Python Version": 3
  "Auto Terminate": "Yes"
  "Auto Termination Time": "Choose next day same time"
  "Extra Python Libs S3Path":
  "Extra Jars S3Path": "Time Based"
  "Datasets With Write Access": Any Datasets that you want to read
  "Datasets With Read Access": Any Datasets that you want to write
  "Keywords": "ETL, Endpoint"
  "Public Keys": Paste the content of `id_rsa.pub` file
}
- Once the endpoint is created,
Glue Endpoint Statuswill be 'provisioning' as shown below.
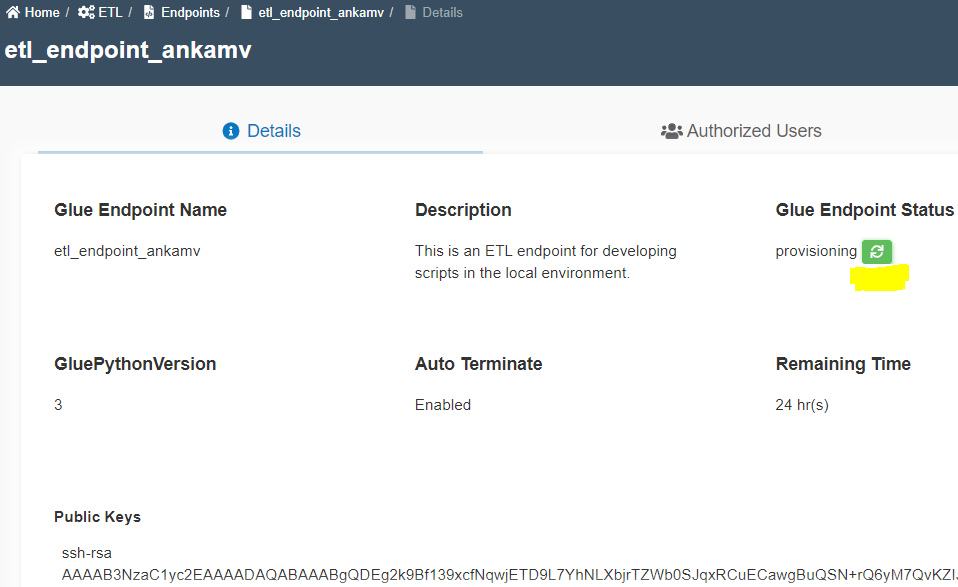
- Click 🔃 to refresh the status.
- It takes approximately 10 minutes time to change the status to
ready. - You may click on
Edit Endpointicon to add datasets or extend auto termination time. - Once the endpoint turns to
readystatus, you will see anConnecttab as shown below.

Use Glue Endpoint
Before using the glue endpint, copy
id_rsaprivate key to your home directory and change permissions.- On Mac or linux,
chmod 400 id_rsa - On Windows, right click on
id_rsafile --> 'Properties' --> click 'Edit' to remove other users/groups. Allow full control for owner --> Click apply and OK.
- On Mac or linux,
Use Pyspark shell
ssh -i id_rsa glue@ec2-xx-xx-xxx-xxx.compute-1.amazonaws.com -t gluepyspark
Use Spark Scala shell
ssh -i id_rsa glue@ec2-xx-xx-xxx-xxx.compute-1.amazonaws.com -t glue-spark-shell
SSH to EMR Master
ssh -i id_rsa glue@ec2-xx-xx-xxx-xxx.compute-1.amazonaws.com
Create and use an ETL notebook
- Click on 'ETL' --> 'ETL Notebooks' from left navigation-bar.
- Click on ➕ icon at the top right corner.
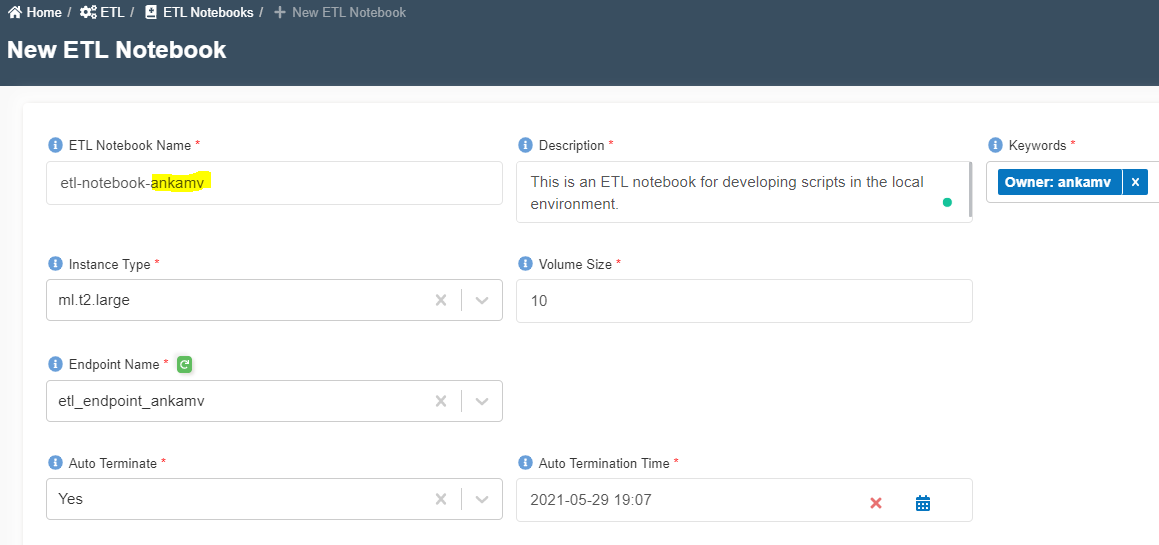
- Enter the following information and click on 'Create'.
{
  "Endpoint Name": "etl_notebook_<your_userid>"
  "Description": "This is an ETL notebook for developing scripts in the local environment."
  "Keywords": "ETL, Endpoint"
  "Instance Type": "ml.t2.large"
  "Volume Size": 10
  "Endpoint Name ": "etl_endpoint_<your_userid>"
  "Auto Terminate": "Yes"
  "Auto Termination Time": "Choose next day same time"
}
- Once the notebook is created,
Notebook Statuswill be 'Pending'. - Click 🔃 to refresh the status.
- It takes approximately 10 minutes time to change the status to
InService. - Once the endpoint turns to
InServicestatus, you will see a link underNotebook URLtab as shown below.
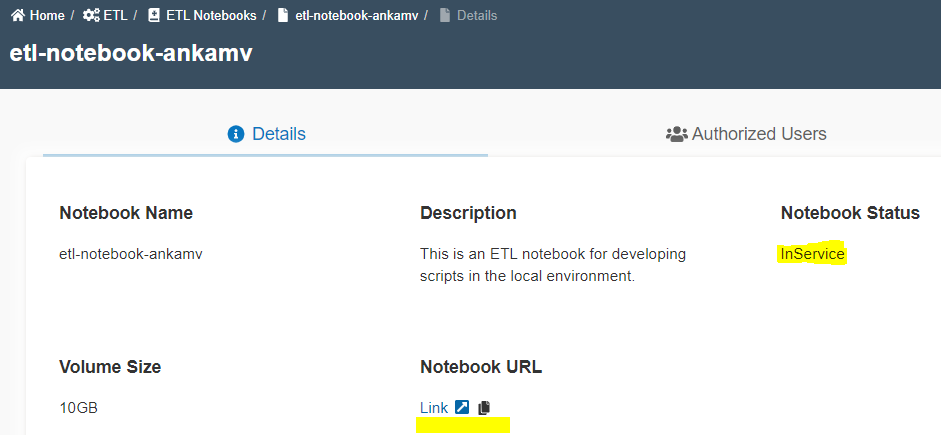
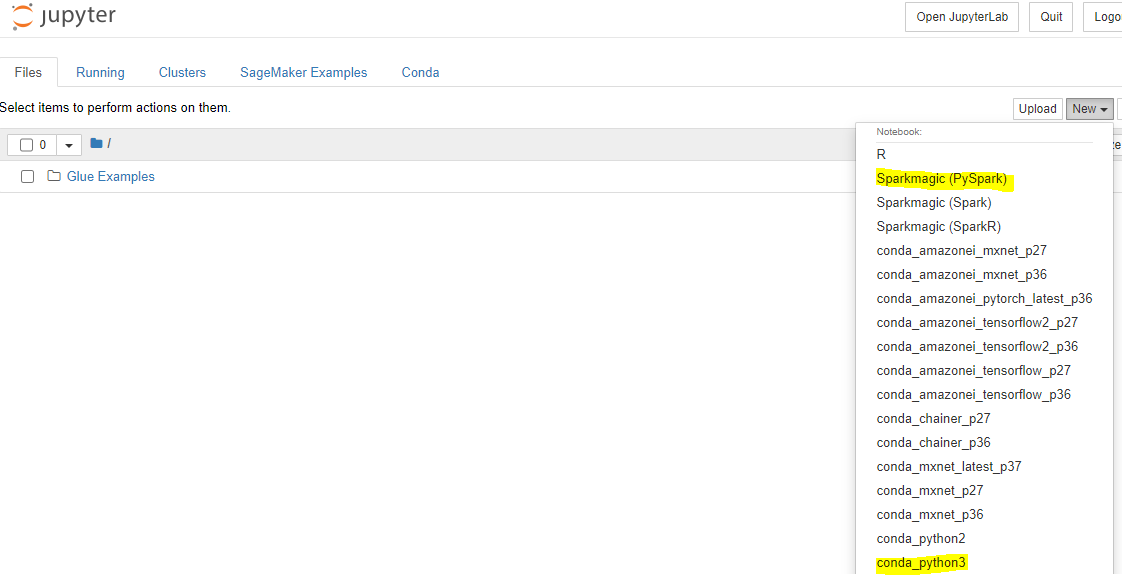
- Click on the link to go to a Jupyter notebook.
- Choose the kernel needed for your development as shown below.
Cleanup
- Click on
Stop Notebookicon at the top to stop the notebook instance. - Click on 'Delete notebook' to delete
etl_notebook_<your_userid> - Go to ETL endpoints and delete
etl_endpoint_<your_userid>.
Congratulations!!!
You've learned how to use ETL tools on Amorphic.