How to migrate external file system data to the Amorphic dataset?

info
- Follow the steps mentioned below.
- Total time taken for this task: 10 Minutes.
- Pre-requisites: User registration is completed, logged in to Amorphic and role switched
Tidbits
- External file system (ext-fs) connections are used to migrate data from a
remote server(On-prem or Cloud) to Amorphic's dataset.
Create a source connection
- Click on 'Connections' widget on the home screen or click on
INGESTION-->Connectionson the left side navigation-bar or you may also click onNavigatoron top right corner and search forConnections. - Click on a ➕ icon at the top right corner.
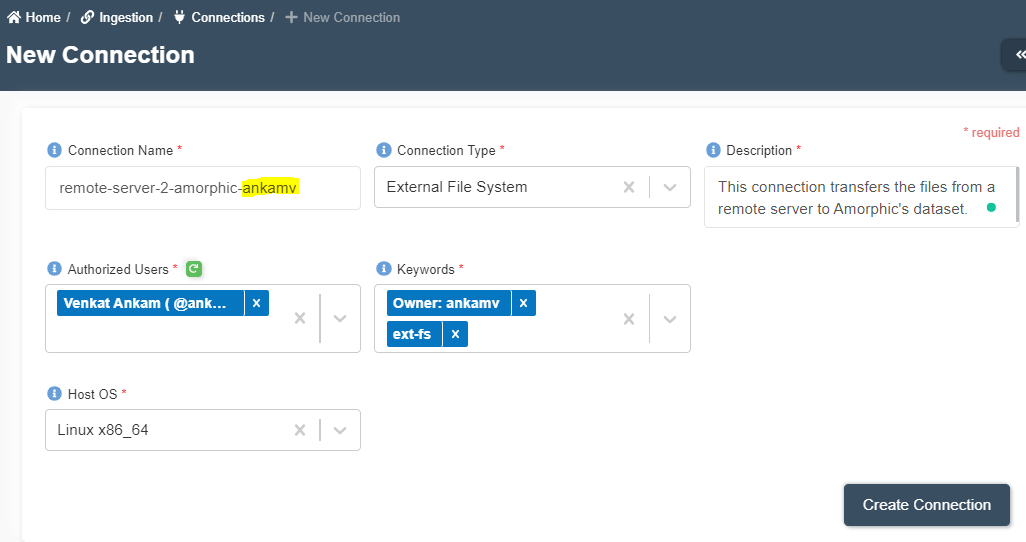
- Enter the following details and click on
Create Connection.
{
  "Connection Name": "remote-server-2-amorphic-<your-userid>"
  "Connection Type":  "External File System"
  "Description": "This connection transfers the files from a remote server to Amorphic's dataset."
  "Authorized Users": "Select your user name and any other user names you want to grant permission"
  "Keywords": "Add relevant keywords like 'ext-fs'. This will be useful for search"
  "Host OS": "Linux x86_64"
}
Check 'csclone' command
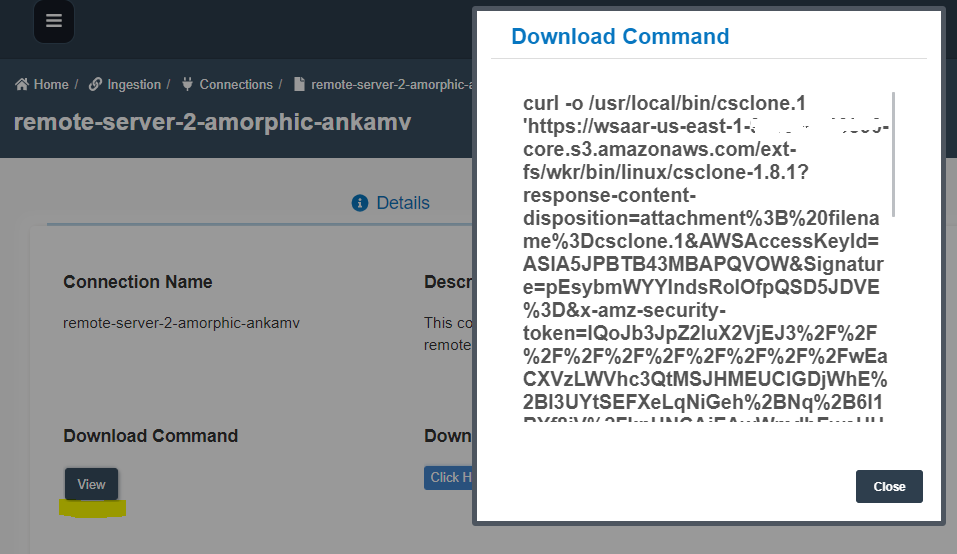
- Once the connection is created, click on
ViewunderDownload Command. - This command to be run on the source server to download
cscloneapplication. - You can copy the entire command by clicking
Click to copyicon at the bottom or just download it usingDownload Link.
Create a target Dataset
- Click on 'DATASETS' --> 'Datasets' from left navigation-bar.
- Click on ➕ icon at the top right corner.
- Enter the following information and click on 'Register'.
{
  "Dataset Name": "remote_s3_2_amd_ds_<your_userid>"
  "Description": "This dataset is a destination for 'external file system (ext-fs)' connection remote-server-2-amorphic-<your-userid>"
  "Domain": "workshop(workshop)"
  "Data Classifications":
  "Keywords": "ext-fs"
  "Connection Type": "External File System"
  "File Type": "csv"
  "Target Location": "S3"
  "Update Method": "Append"
  "Connection": "remote-server-2-amorphic-<your-userid>"
  "Monitored Paths":  /ingest_data
  "Enable Malware Detection": "No"
  "Enable AI Services": "No"
  "Enable Data Cleanup": "No"
}
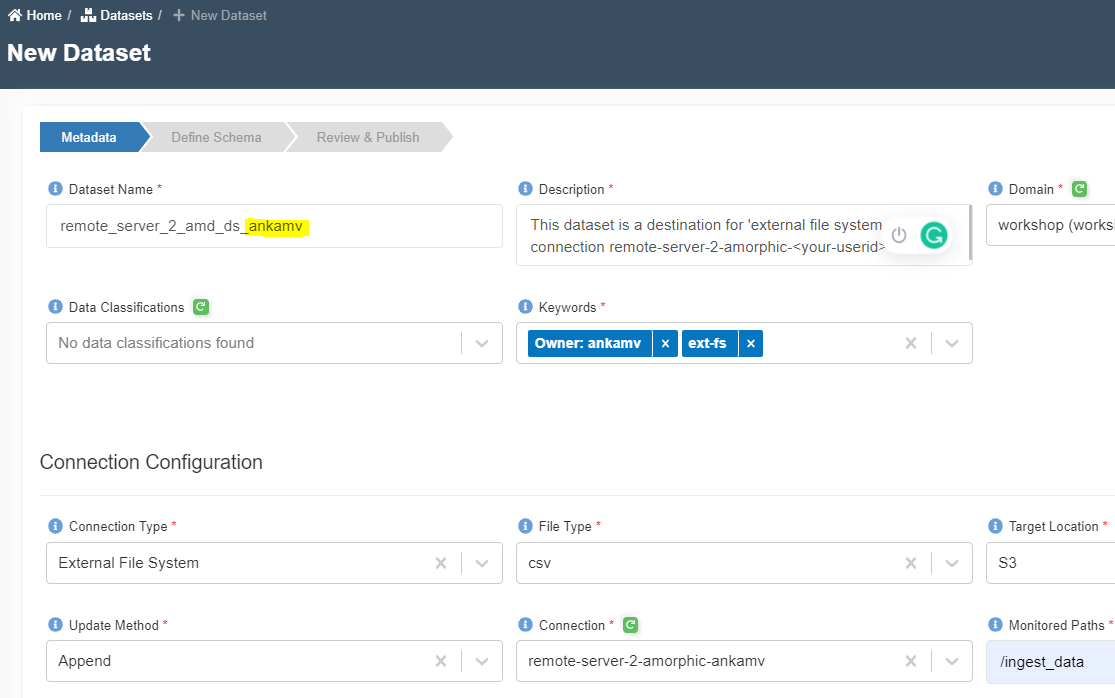
- Once the dataset is created, it will show the command to be executed on source server.

Create a remote server
💡 If you already have a server, jump to Configure remote server. 💡
- Let's create an EC2 instance in your AWS account.
- Login to AWS Account to go to EC2 Service.
- Click on instances --> Launch instances.
- Select the Amazon Linux AMI with ID ami-0d5eff06f840b45e9.
- Select t2.medium or a better instance.
- Select a security group that allows port number 22 (SSH) from your machine.
- Select an existing key pair(pem file) or create a new one.
- Once the server is running, SSH to it using the pem file.
Configure remote server
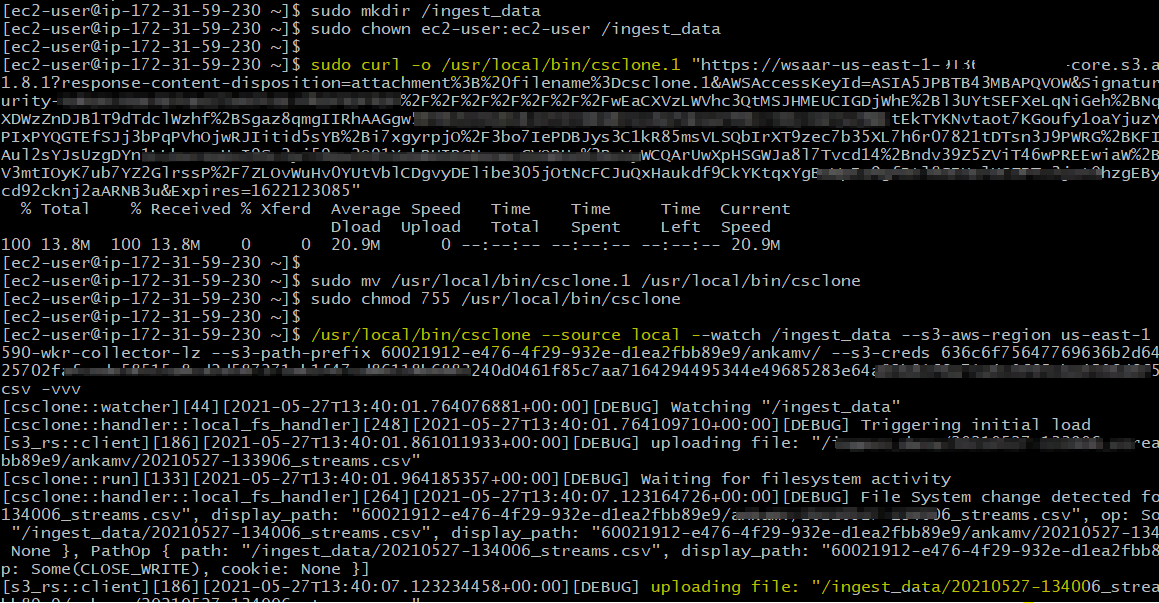
- Run following commands on the source server.
sudo mkdir /ingest_data
sudo chown ec2-user:ec2-user /ingest_data
sudo curl -o /usr/local/bin/csclone.1 "https://wsaar-us-east-1-9XXXXXXXXXXX..." <-- Download `csclone` application by running the command copied from source connection.
sudo mv /usr/local/bin/csclone.1 /usr/local/bin/csclone
sudo chmod 755 /usr/local/bin/csclone

/usr/local/bin/csclone --source local --watch /ingest_data --s3-aws-region us-east-1... <-- Run csclone command copied from target dataset.
- The following screenshot shows the execution of commands on the server.
Add files to the source server
- Run this command locally to copy any CSV file to the server location.
scp -i your-pem-file.pem stream.csv ec2-user@your-server-ip-address:/ingest_data/stream.csv
- Monitor the status of files being copied.
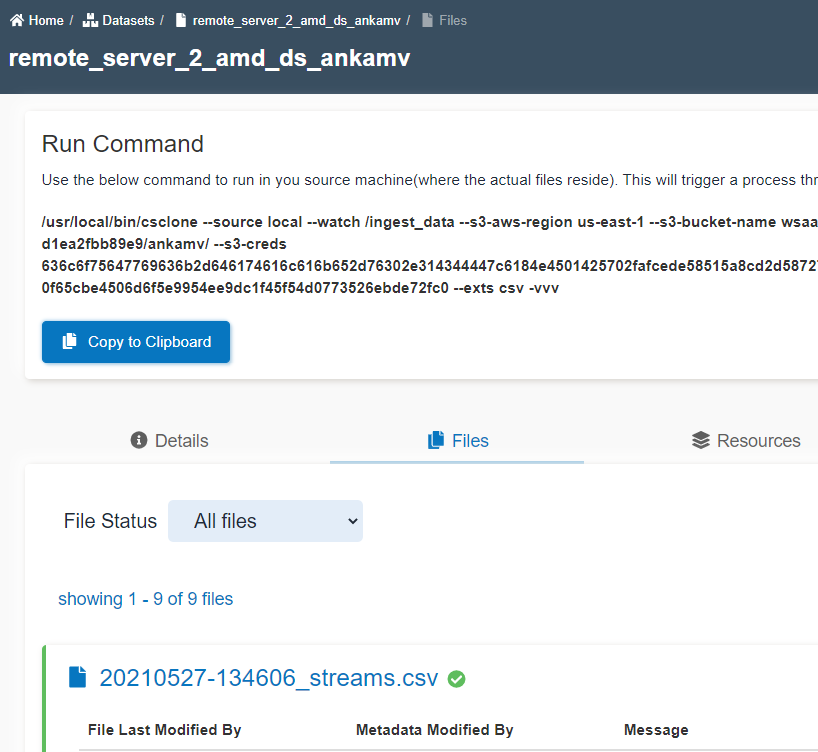
Check data transfer
- Check the
filestab of the target dataset. The files added to the source server should appear here.
Stop csclone application
- Press
ctrl + con server to stop the application.
You can do more...
- Write a small python program to write files to /ingest_data.
- You may refer to creating python program and crontab.
- Add 'csclone' command to crontab schedule on the server.